Every Roon Ready player is certified by Roon to guarantee the same stellar experience
Roon Ready network players from our partners have Roon’s high-resolution streaming technology built right in. They combine simple setup, daily reliability, and support for the highest level of digital audio performance in the industry
The core is PC/NAS which installed Roon software. Roon information center from many information sources, that is a music database.
You can install the free Roon app on as many devices as you want. It’s available for iPad, iPhone, Android tablet and phone, Mac, and Windows.
Zidoo Device, brain of your system. Manage your Roon core, HiFi playback and decoding, improves the streaming sound quality and Output to audio devices.
In order to get the best high-perfomance audio, you can use a Network Music Player which have Roon Ready logo.
Need to bind a VISA credit card to activate the 14-day free trial after the account is created. USD$1 will be charged to test whether the credit card is valid when. It will be automatically refunded to you after a few minutes. In order to avoid produce extra cost, pls cancel the credit card binding before 14-day trial ended.
Download Roon from official website: https://roonlabs.com/downloads
1.1 Default language of Roon is English, click “English” in the lower left corner to switch the language to you want. then click” Restart now” to restart the software.
1.2 After you " I agree " to start configuration, Use Win10 separately to install Roon, click ”Use this PC” under “ Set up a Roon Core on this PC”
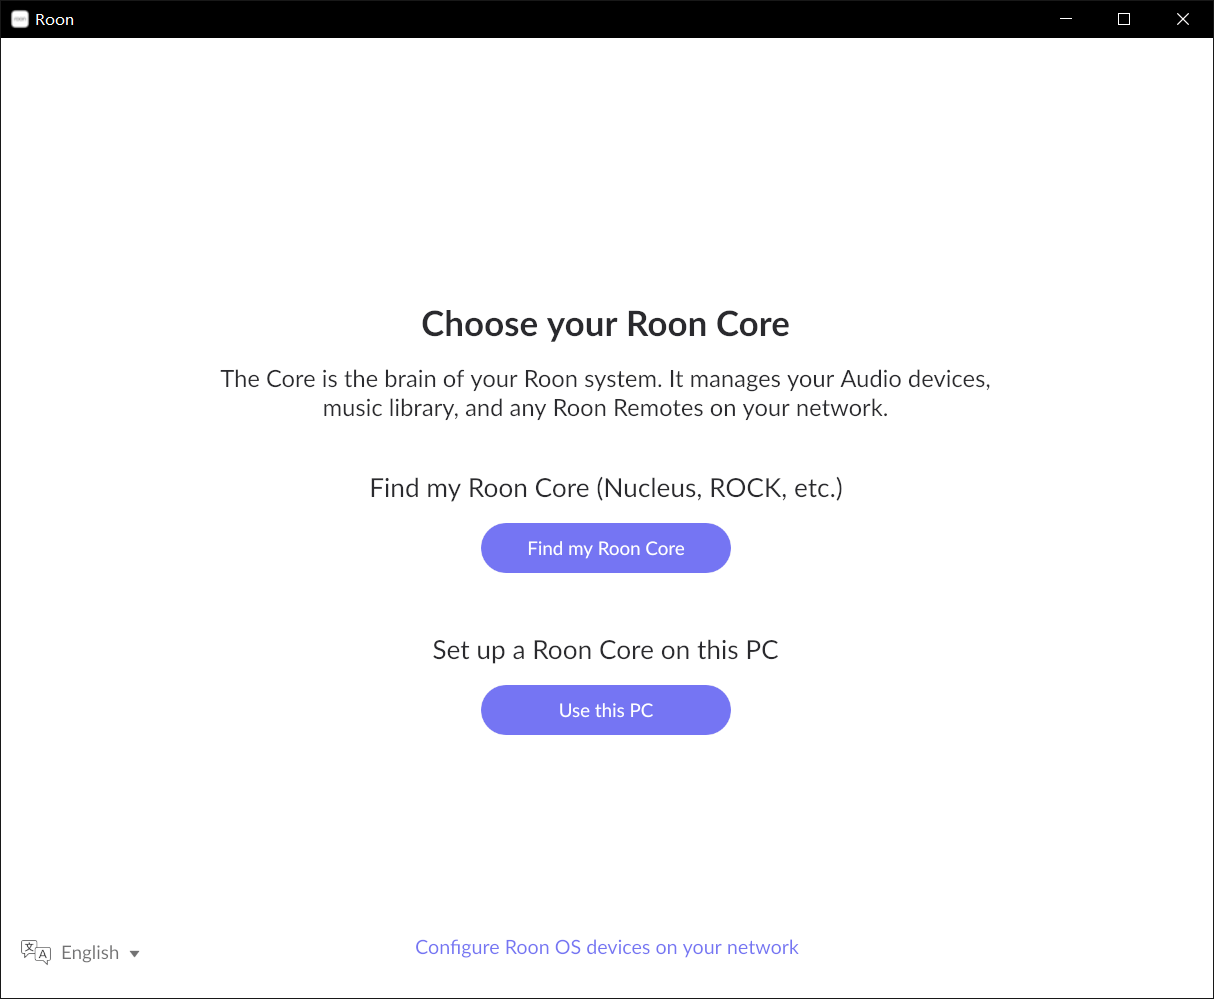
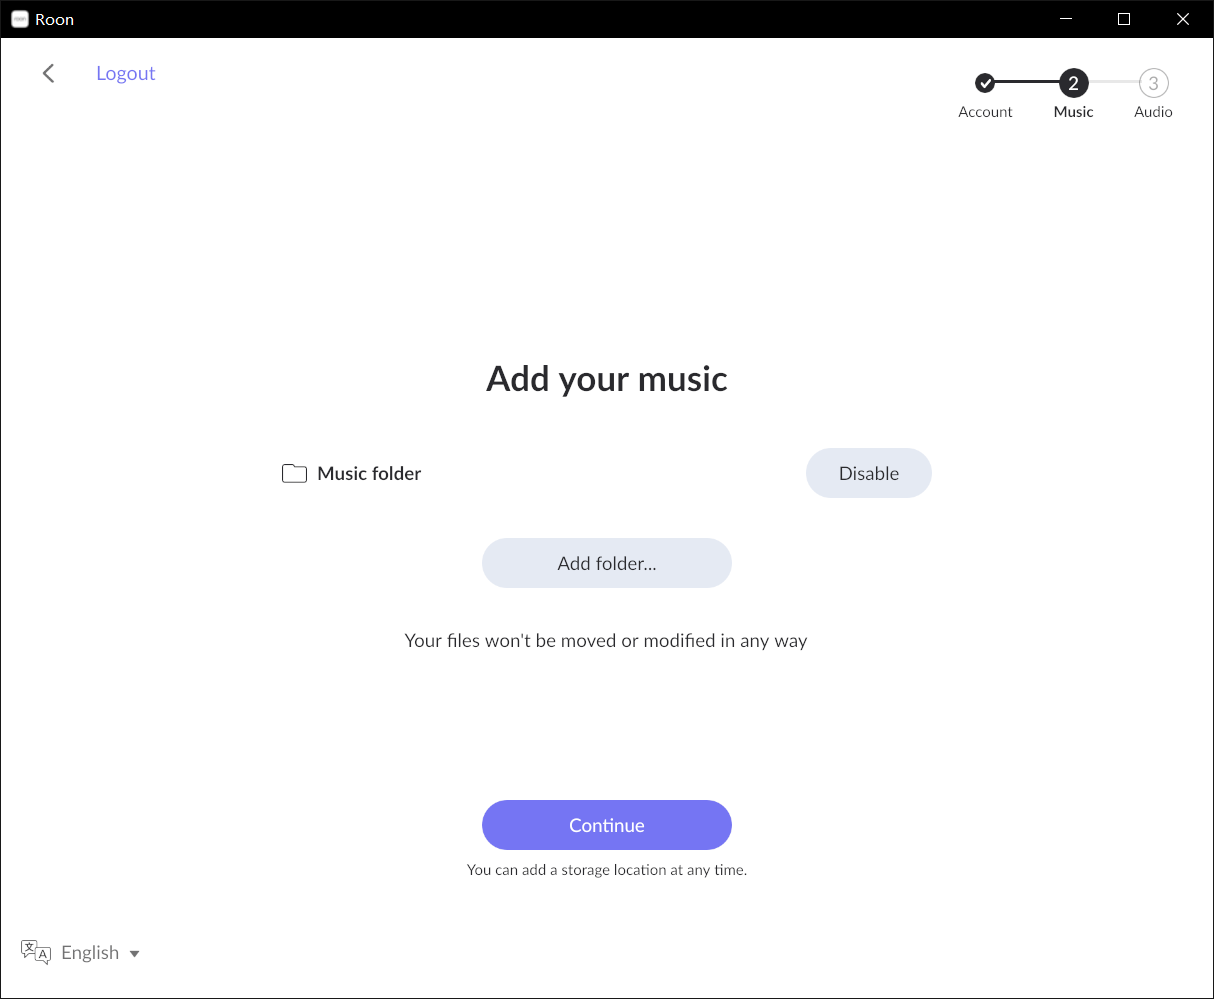
1.3 Input your Roon account to complete the login. If you don’t have an account, click” Start free trial” to register, the new user will be given a 14-day free trial period. Click “Add folder” under “Add your music” path
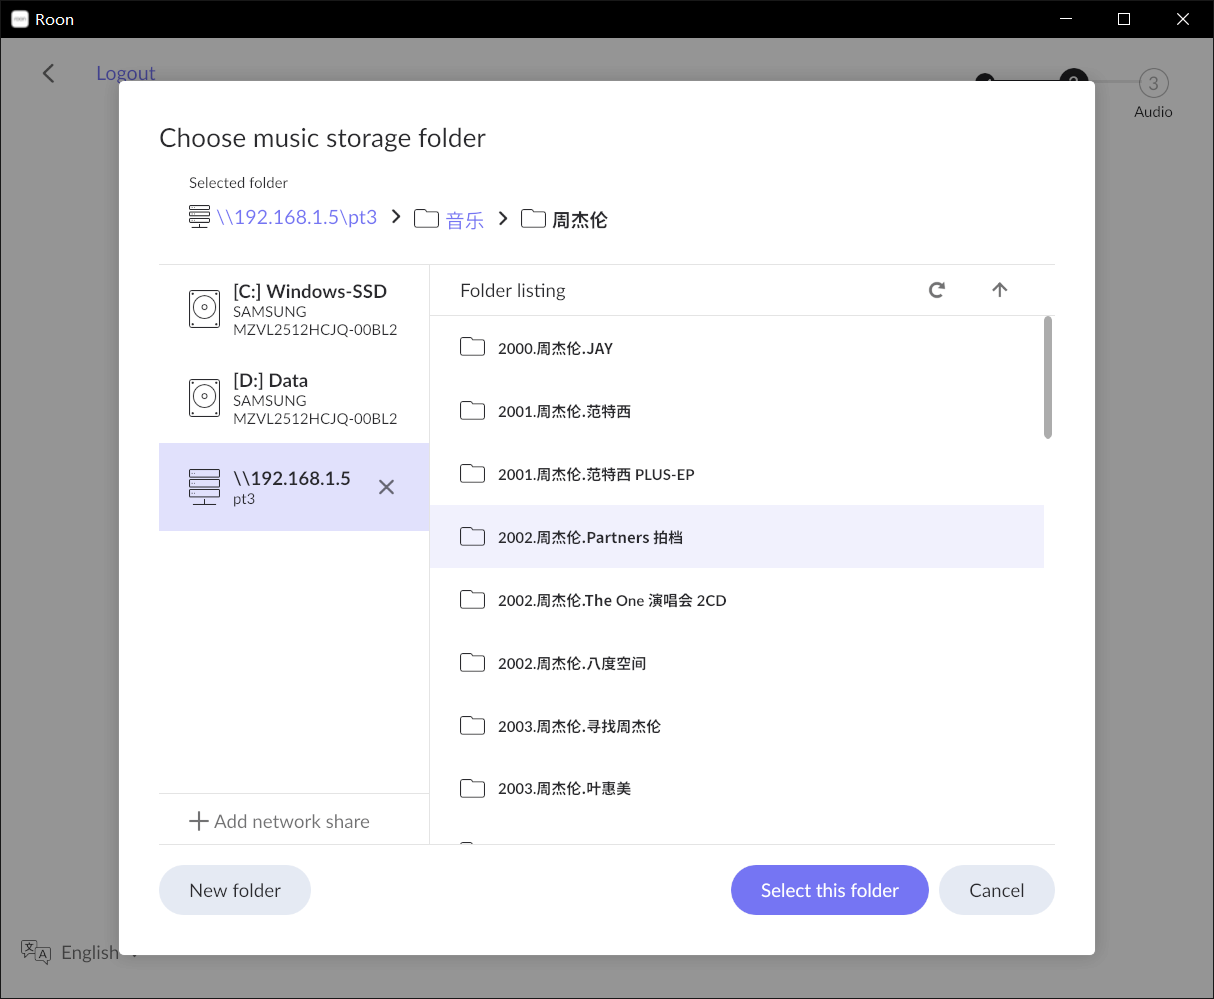
1.4 Add the music folder of computer hard disk and network share. This tutorial takes Synology NAS as an example. Click ” Select this folder” in the lower right corner to complete add job after selecting music storage folder
1.5 Add multiple music folder paths one by one under this option, click ”Continue” when all of them are added. Below step can be skipped, click” No,thanks”
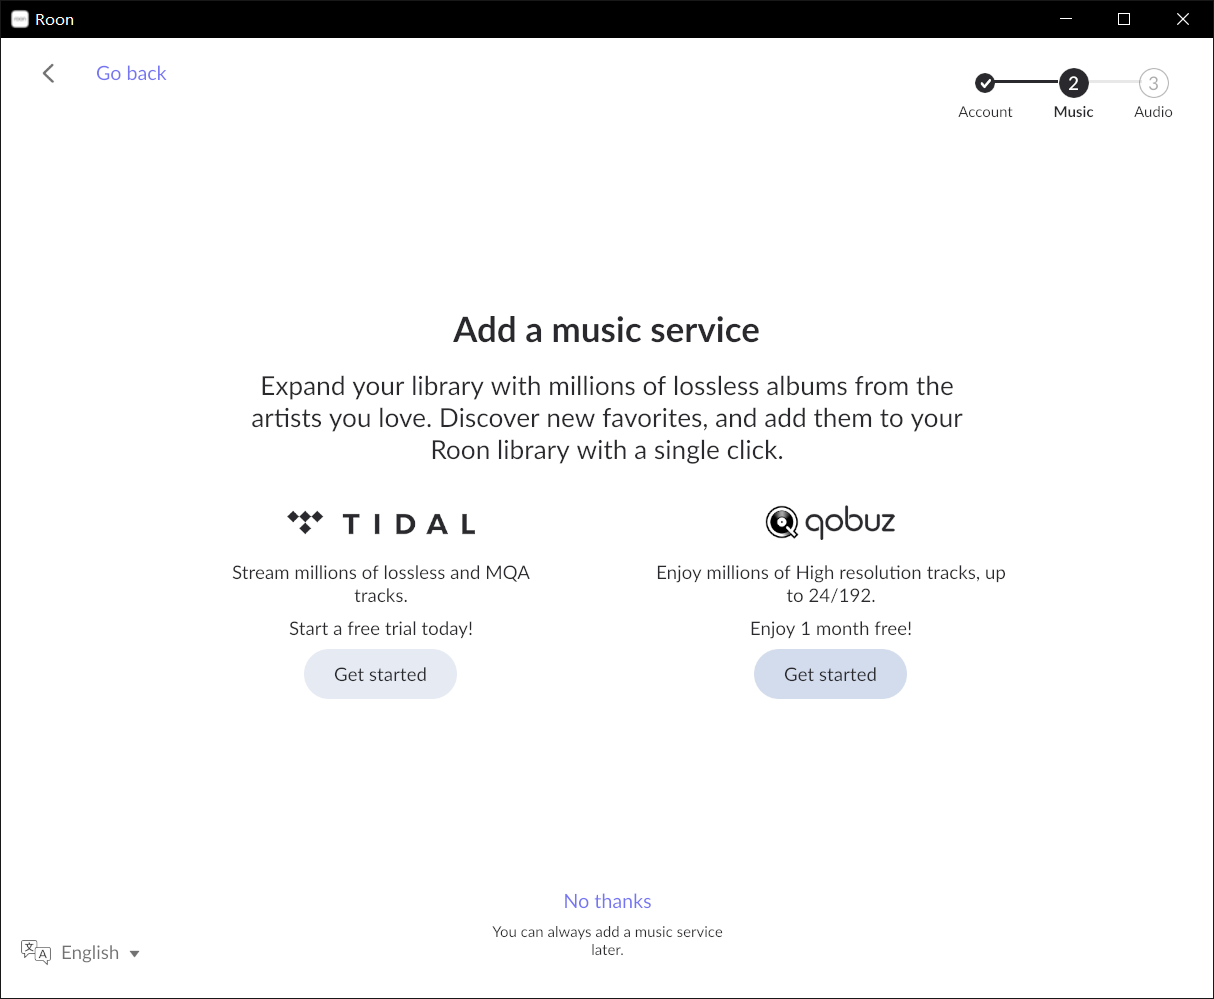
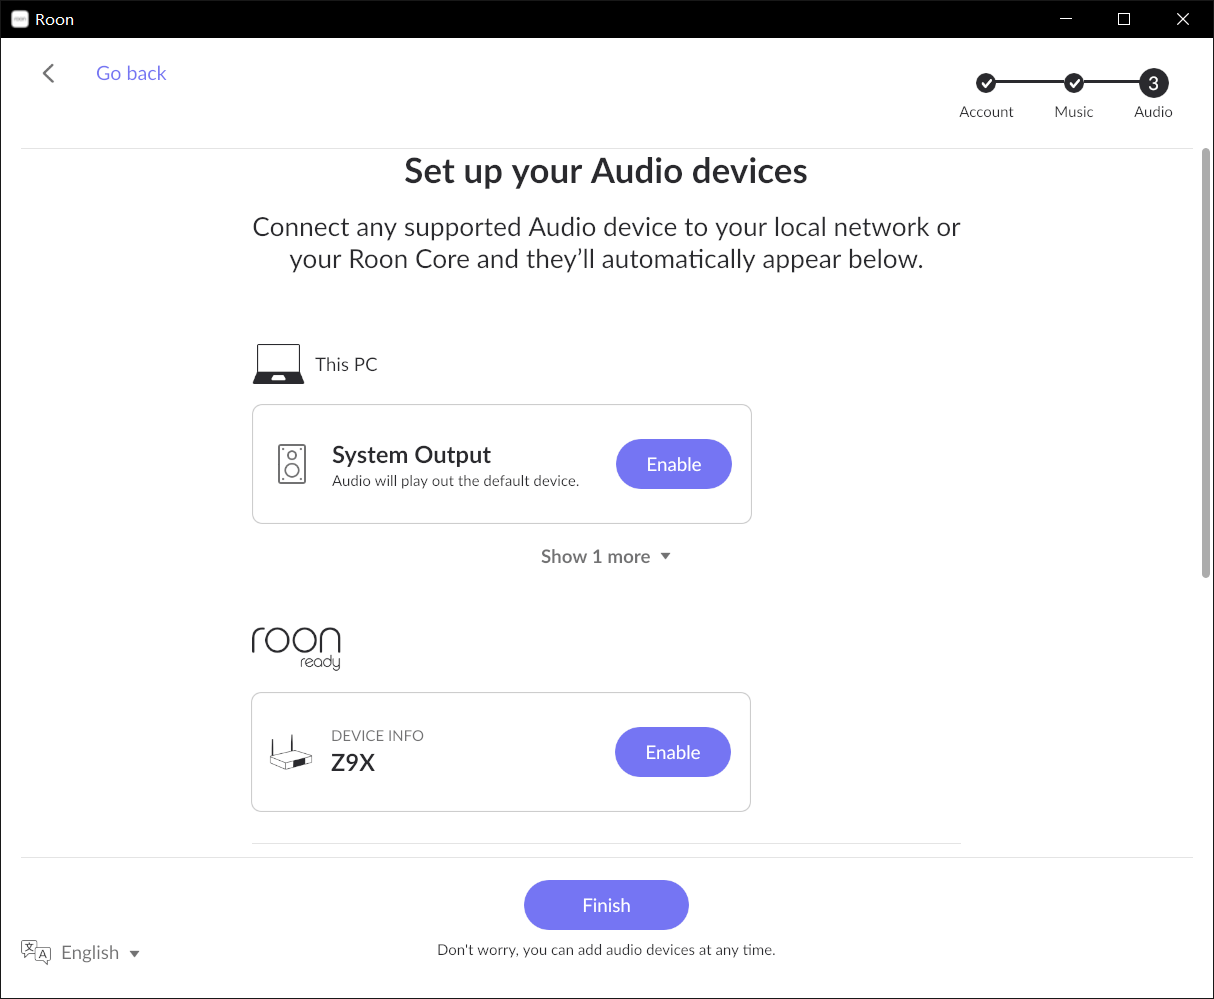
1.6 Below step can be ignored, click”Finish”
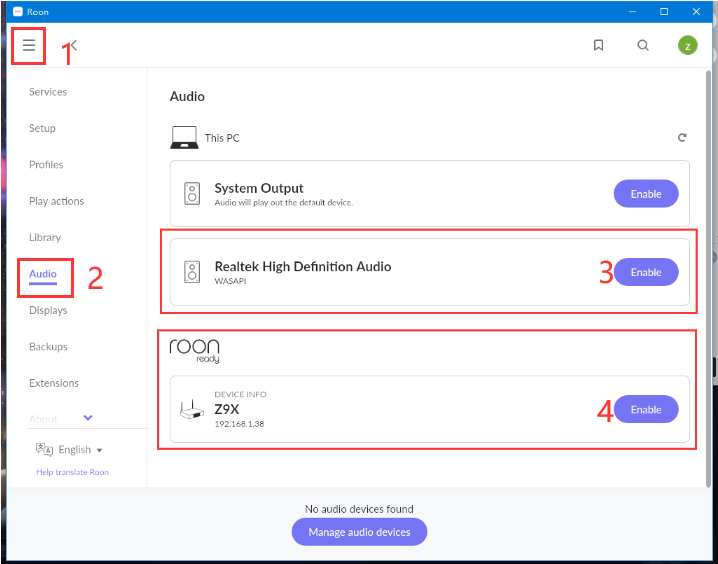
1.7 Click the icon in the upper left corner to enter Settings→Audio. “ Enable” WASAPI under “This PC” and ” Z9X” under Roon Ready option
Note: PC and Zidoo player should be in the same LAN
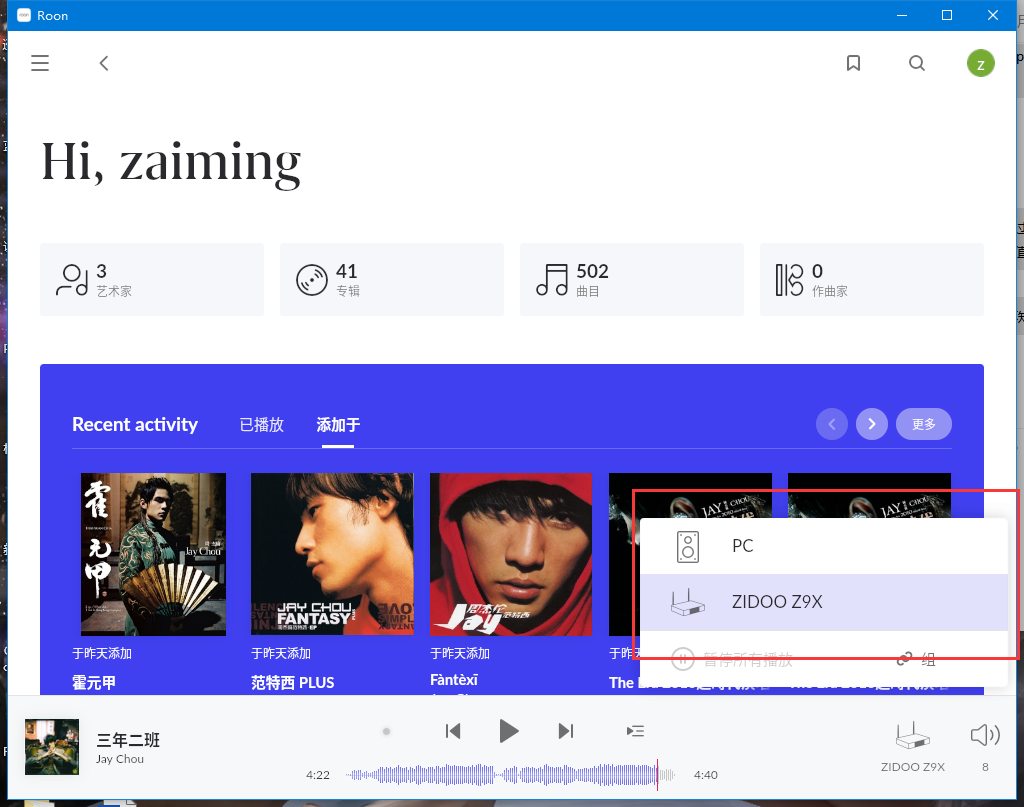
1.8 Finally, return to the main interface of Roon, click the icon” ZIDOO Z9X” in lower right corner to select the device you want to make a sound. PC means sound will be output from computer, and if you select ZIDOO Z9X, the player will output the sound.
The basic setting of Roon is completed.
1.9 Enter “My Library” to play a song at will, Roon will stream it to your audio devices.
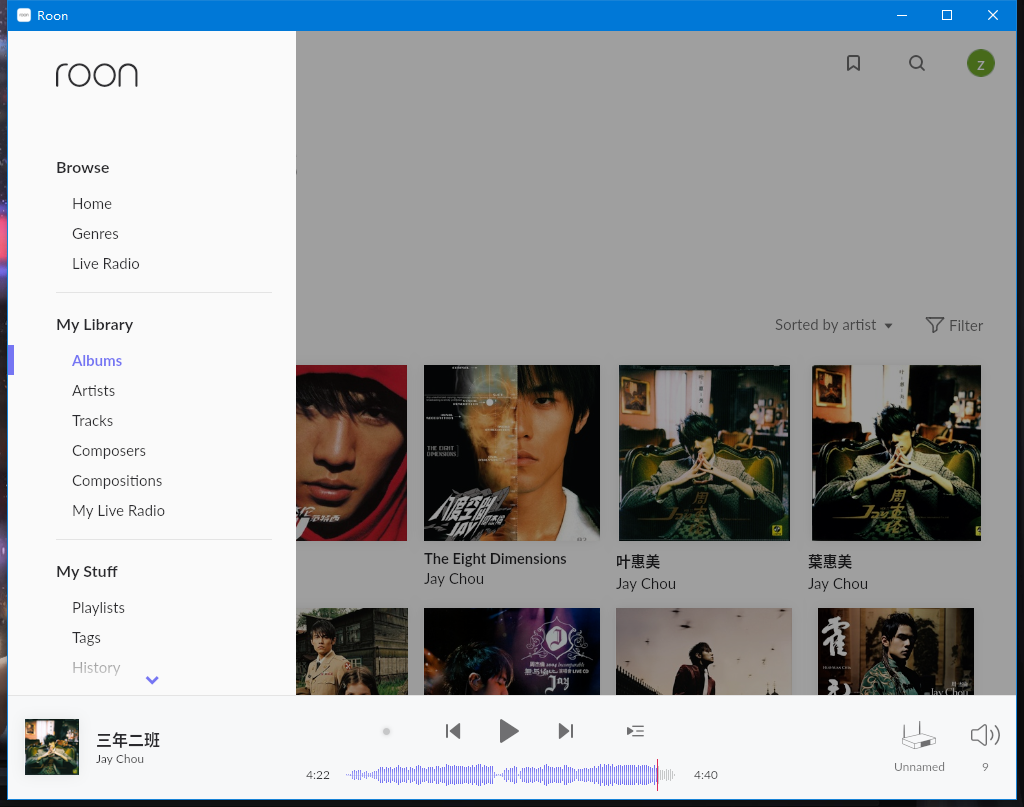
1.10 Click the left arrow icon on the playback interface to check the details of current music.
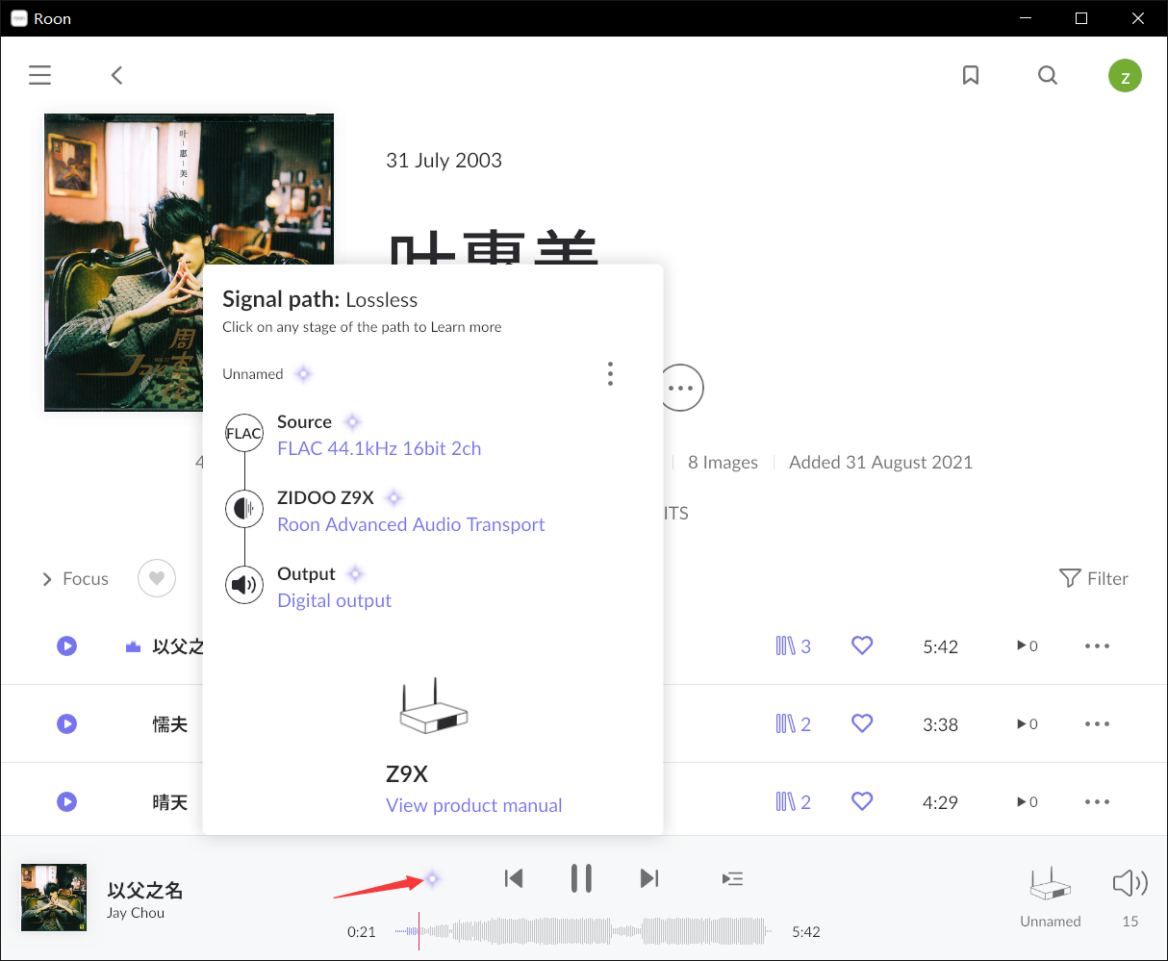
Tutorial takes Synology DSM6.1 as an example
Introduction about install Roon Core on NAS in offcial website
https://help.roonlabs.com/portal/en/kb/articles/roon-server-on-nas
Installation package of Roon on Synology NAS
DSM6.x(x64):
https://roononnas.org/builds/Synology/RoonServer_Synology_x86_64_2021-03-08.spk
DSM7(x64)
https://roononnas.org/builds/Synology/RoonServer_Synology_DSM7_x86-64_20210809-beta.spk
For other NAS systems, please login Chris Rieke’s official website for downloading
https://roononnas.org/de/roon-auf-nas/
Note: Roon officially recommends that the NAS needs at least 4GB of memory. It is recommended to install Roon Core into the SSD hard disk.
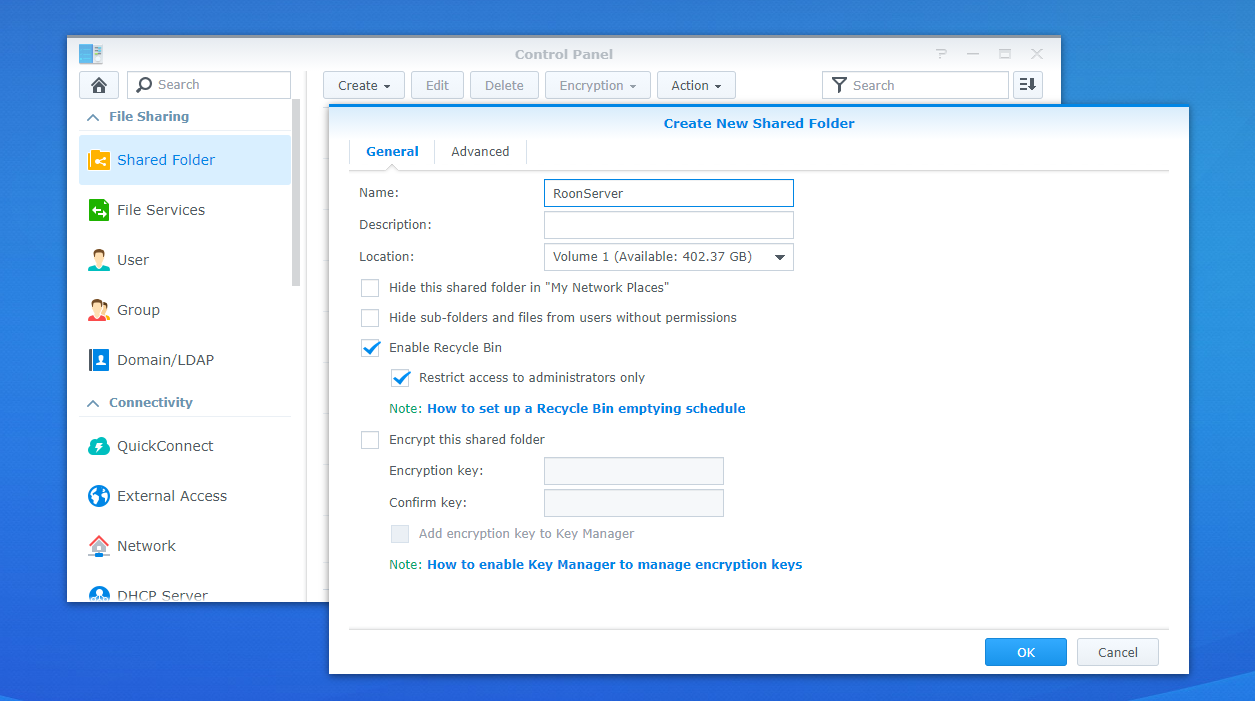
2.1 Login Synology DSM and enter the Control Panel→Shared Folder→Create new shared folder of Roon Server, click” ok” to save the folder.
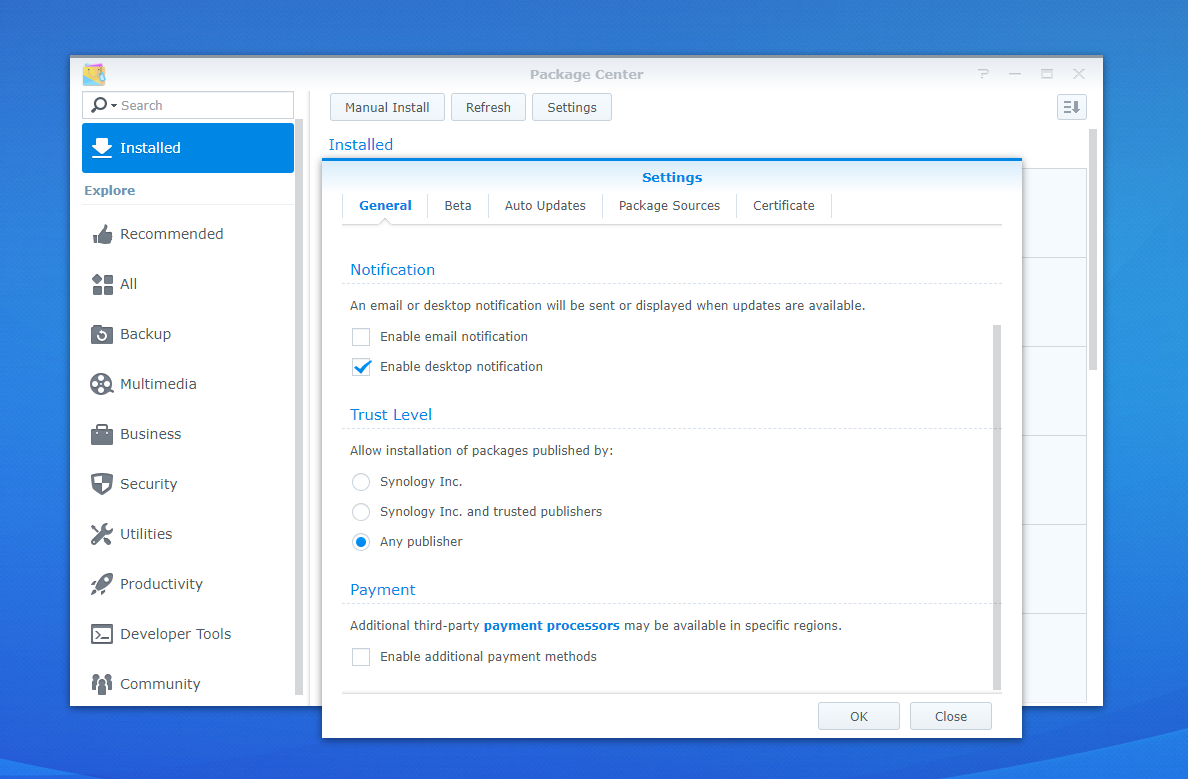
2.2 Enter Package Center→Settings→General→Trust Level to check“ Any publisher”, then click “ok”
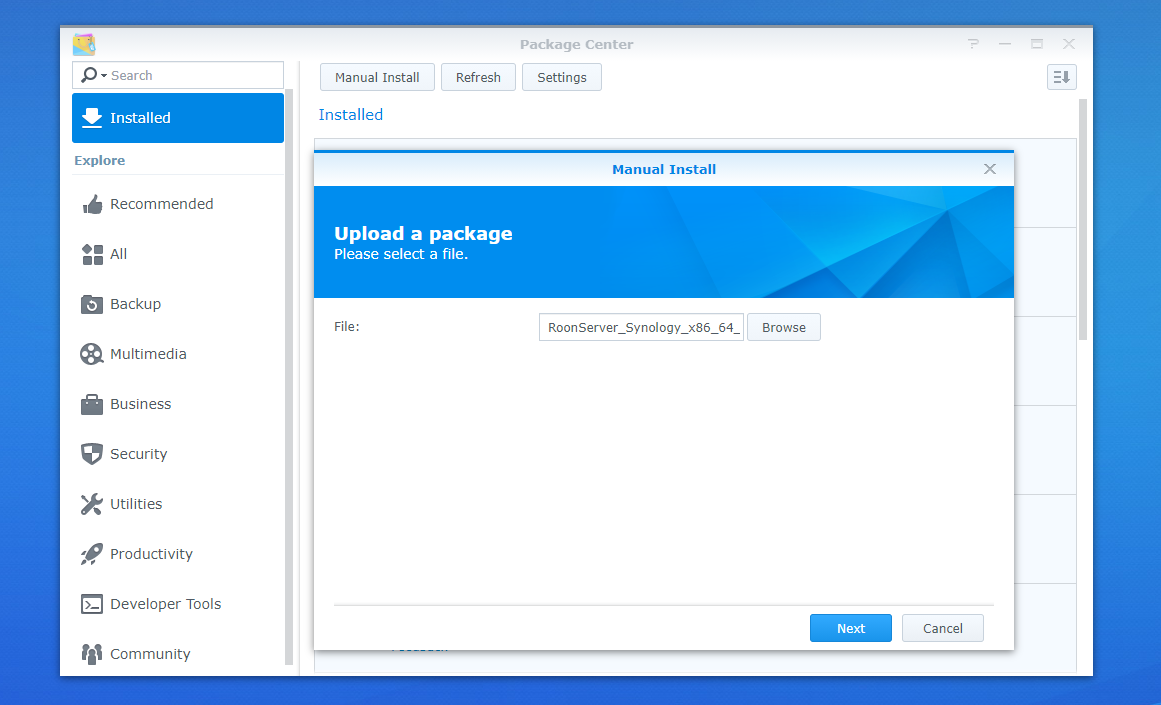
2.3 Click Manual Install, will pop up the option box, click”Browse” to upload local Synology plug-in installation package RoonServer_Synology_x86_64_2021-03-08.spk, then”Next”
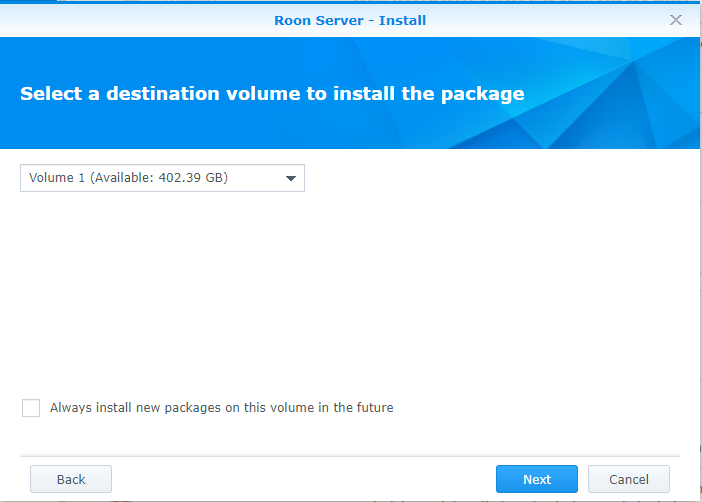
2.4 Select a destination volume to install the package. SSD hard disk is recommended as the installation location, then click “ Next”
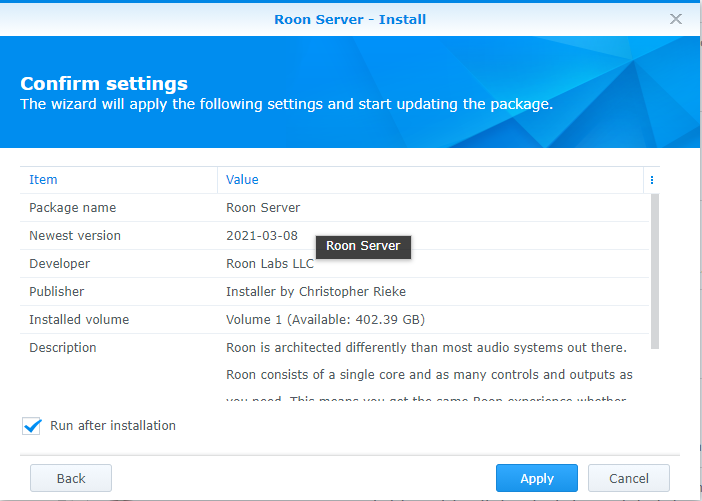
2.5 Check “I already took care of it”, click “Next”. then click” Apply” and wait a while until the installation is complete.
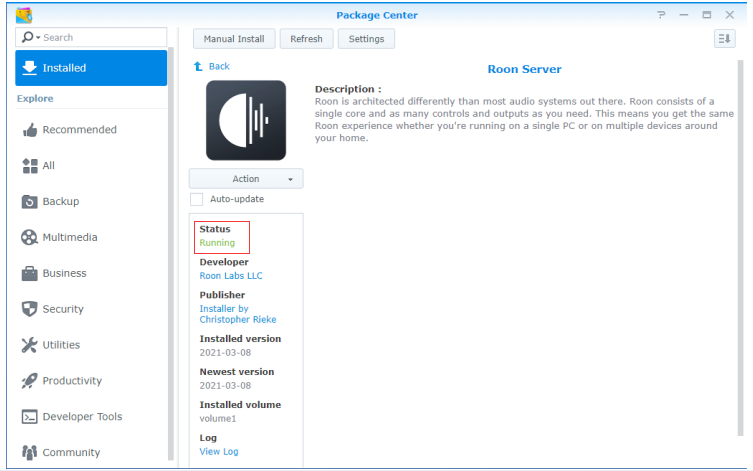
2.6 Enter Roon Server to check the status, If the status shows”Running”, means Roon Core is installed on Synology.
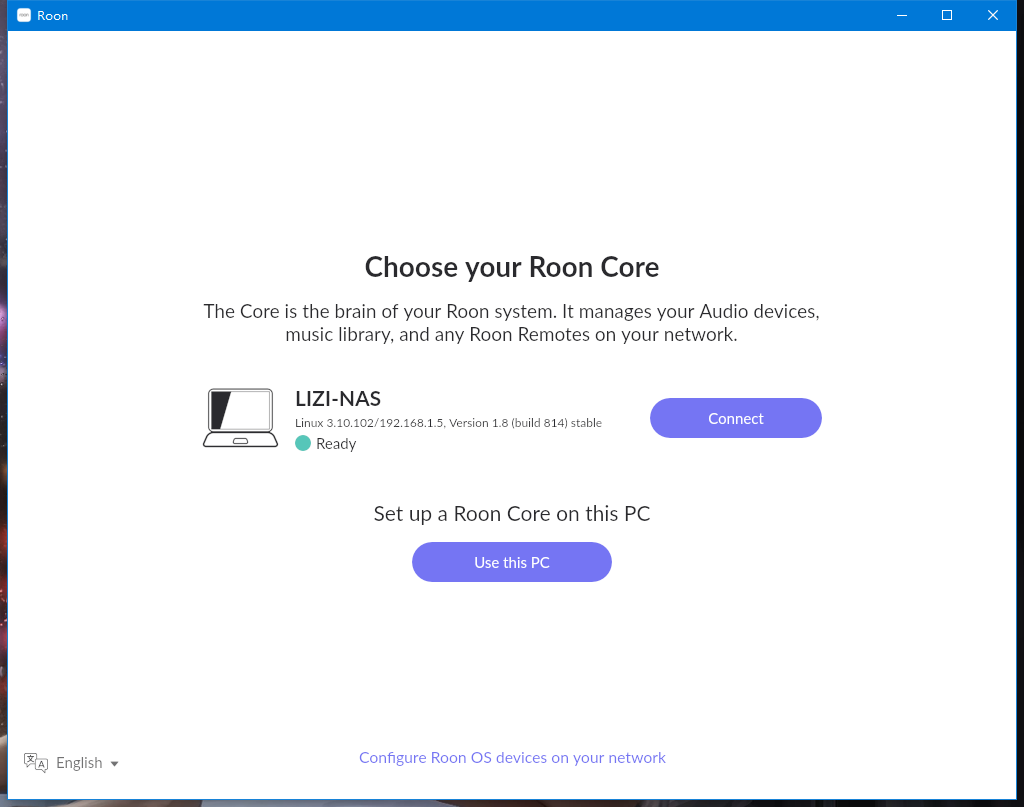
2.7 Roon will search for the Roon Core which is installed on Synology NAS automatically when you enter” Choose your Roon Core” interface, Click " Connect”
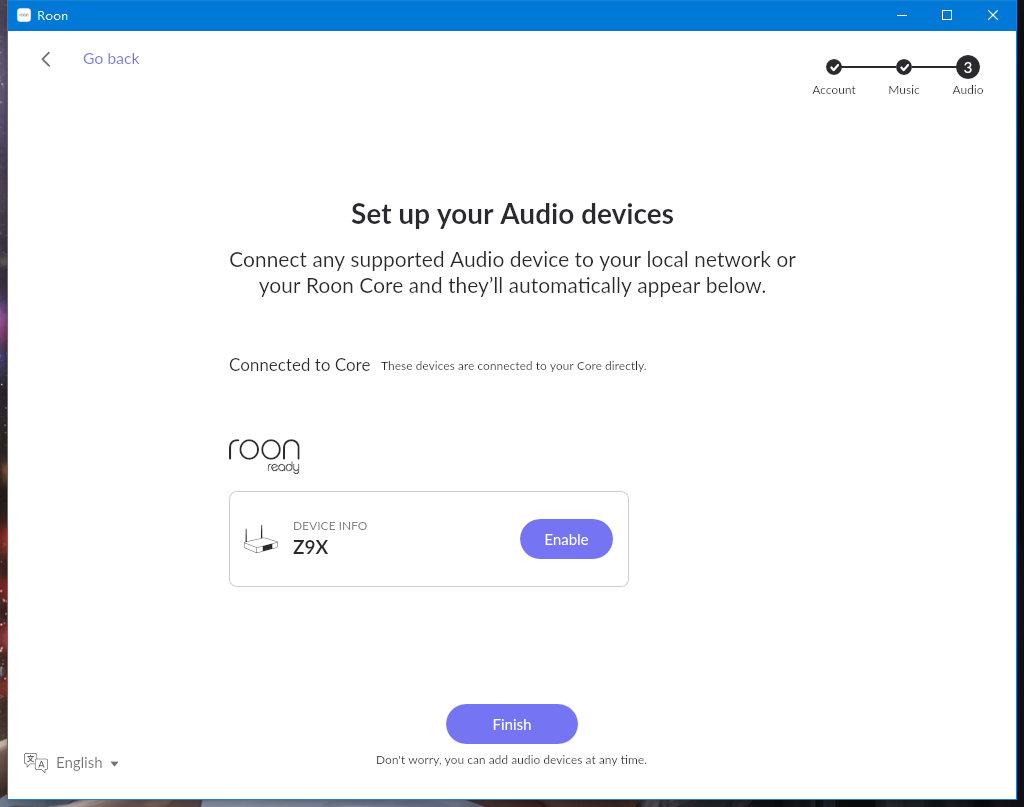
2.8 Same steps as 1.3---1.5 below, then Set up your Audio devices. If Z9X which in the same LAN is powered on currently, Roon will search for it automatically. Click “ Enable”, the icon will change to gear. Then click” Finish”
2.9 In main interface of Roon, click “Select an audio zone”. then Select ZIDOO Z9X,you can customize the device name at the same time. Roon configuration is completed.
Note: If you want output the music from computer, click the three horizontal icon in the upper left corner enter Settings→Audio→“ Enable” WASAPI under “This PC”
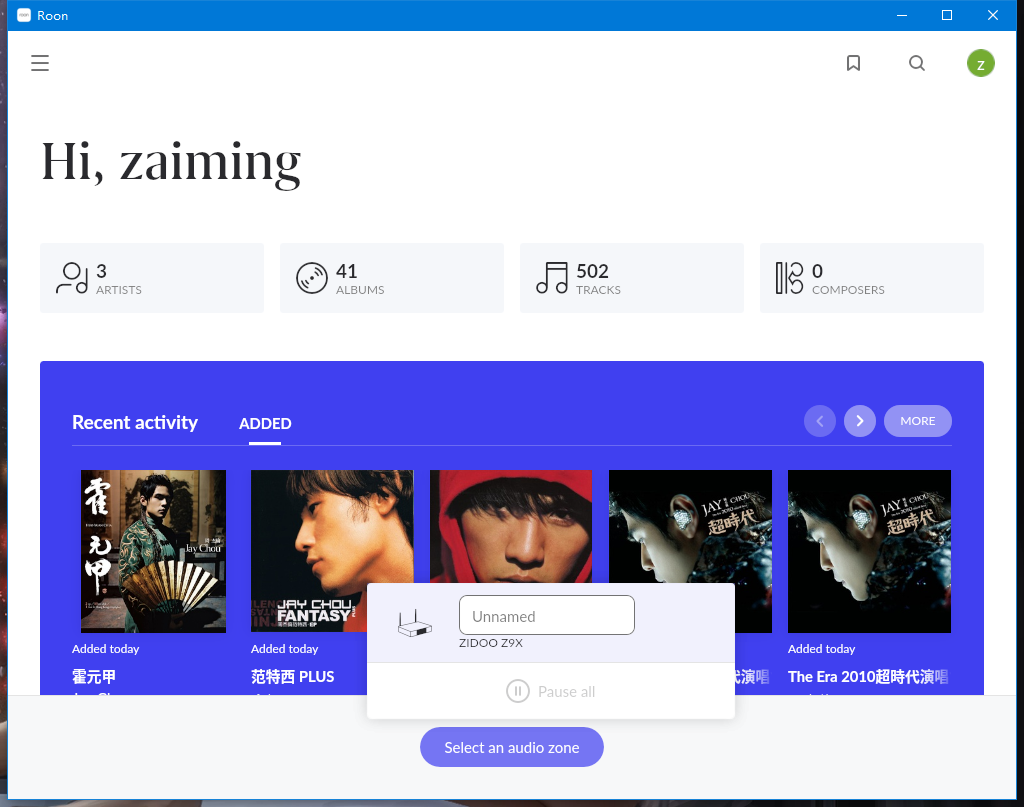
2.10 Enter “My Library” to play a song at will, Roon will stream it to Z9X
The tutorial takes an Android phone as an example
Official download address for Roon on mobile phone
Android:
https://download.roonlabs.com/builds/RoonMobile.apk
Apple iOS:
https://itunes.apple.com/WebObjects/MZStore.woa/wa/viewSoftware?id=1014764083&mt=8
3.1 Startup ROON, switch the language to you want
3.2 Mobile phone connect to WIFI, the software will search for Roon Core which is installed on the computer and Synology NAS in the LAN automatically. Click “Connect” to complete the match.
Note: If automatic search fails,pls click”Help” to manually input the IP of the Roon Core to pairing connection.
3.3 After complete the settings, enter the main interface of Roon without login. Click “Select an audio zone”at the bottom of interface→select “ZIDOO Z9X”, then can control the Roon stream the music to Z9X
Note:Because Roon Core is installed in Synology NAS, you can use mobile phone to control the playback even without turning on computer
3.4 If you want output the music from mobile phone or computer, click the three horizontal icon in the upper left corner to enter Settings→Audio to enable corresponding device,then switch the audio zone from ZIDOO Z9X to your mobile phone or PC.
